Identity theft has become very common in the recent days and almost all the computer users have poor experience of virus infection. Once your computer is connected to internet, your PC becomes vulnerable to viruses and other malicious objects. And you need to go online to carry out your tasks and get connected with the entire world. You might be thinking how to protect your computer from the online threats. Here comes the importance of PC security support. There are many computer repair companies that offer tech support to the PC users for safe, secure and hassle free computing.
Online PC repair companies eliminate vulnerabilities that pose threat to your PC security. They employ technicians who formulate ways to protect your computer from being exploited. In most of the cases, tech support experts have the skill and knowledge to offer robust security for protecting your PC from online threats.
What these companies do to protect your computer? PC Security support form online computer repair company includes wide spectrum of services. They offer Windows defender for spyware, security tips for Windows OS, installing and configuring of Windows firewall, securing Windows NTFS files, laptop security configuring, third party firewalls, managing and password-protecting files and folders. Services also include user account configuration and protection, setting up Windows parental controls, protecting email accounts, and hack-proof browsers and operating systems.
These companies offer PC Security support through Internet. Once you get in touch with any such company they connect your computer remotely via encrypted software and check the security status of the system. Then they run a complete virus scan to diagnose the problem and resolve the issue. Their solution deliverables include scanning and quarantining malicious objects residing in your PC, implementing security tools for optimum protection, installing, uninstalling and reinstalling antivirus as well as password-protected file sharing, blocking adware, pop-ups, phishing attacks and malware.
As a part of service, they also install and configure antivirus software applications like Micro, Kaspersky, Avira, Symantec, Avast, and MacAfee, etc. But you need to buy the software. Another most alluring feature of availing PC security support from computer support service providers is that it is very much cost effective. You get complete PC protection at an affordable monthly charge. Apart from that these companies also offer many free services and software programs to the computer users for hassle-free and safe computing.
So, if you are worried about computer viruses or other PC problems, you can opt for PC security support.
source: article pool
Online PC support services are gaining in popularity because of their being cost effective as well as the ease that comes along. Technicians ensure offering customers the best remote pc support services. There are many other advantages to avail such a kind of support services.
Online pc or computer support resources offer a safe and communicative service, targeted and designed for all kind of customers holding different interests. Talking about computer repair services, they are leading when it comes to quality. Here, customers avail the support in the most user friendly and interactive manner and don’t need to get confused with the complex computer jargon. Furthermore, these services suit to everyone’s budget and needs.
PC support specialists keep interacting with customers and as they reply to technical queries and offer advice. As the horizon of computer network is expanding, there is an increase in number of computer support specialists and technical support technicians who are able to provide technical support from remote locations.
Emergence of remote technical support resources have eliminated a need for technicians to travel to the customer’s workplace. Indeed, customers also don’t need to haul their PCs to outside repair shop. Technicians also can administer and configure networks and servers remotely. The practice has become common as it is among computer support specialists.
Computer technical support technicians can help with a range of computer problems; from simple start-up errors & device conflicts to blue screen errors & system freezing. Whatever your computer problems, avoid the headache and hassle of a faulty PC with online computer repair service.
The array of computer support services may start from simple services like computer set up & installation, computer optimization, troubleshooting computer problems, computer security, and online data back-up services.
The best part about online pc support is its 24x7 availability which actually attracts tech savvy consumers. Always be meticulous about your choice of computer support partner. It should be based on the experience, market reputation, and service price.
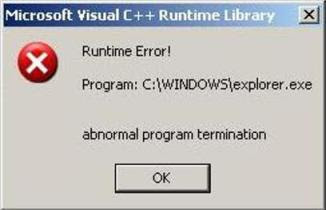 Runtime Error is a type of computer errors when a specific program is running. Usually, the error is linked to missing, damaged or out-of-date files in the Windows registry. Or, some application errors or virus infection can be the source of this runtime error.
If your computer is troubled with runtime errors, it is probably suffered unable to run an application smoothly, decreasing usage of CPU or even slow computer speed. So, you cannot neglect risk of such error. But, do not feel afraid of it. This post will help you on how to fix a computer runtime error in order to solve all these problems and speed up computer to the end.
As it is involved several aspects of computer, you can follow the suggestions to fix the problem step by step:
1. Remove Virus from your computer
- If runtime error occurs due to virus infection, it is a must to get rid of this virus out of your computer as soon as possible. In fact, computer virus is the culprit of most computer problems including runtime errors. Any minor virus can bring unforeseen disaster to your computer. But it is known to all that to remove virus from computer is too hard for common computer users. Therefore, when you have encountered this kind of error, it is your first method to overhaul your computer with professional anti-virus software.
- Since runtime errors happen during the execration of applications, you are supposed to check if the currently-running ones are working normally. In such case, it is probably the problem of the application itself. Therefore, you can close down and reopen this program firstly to see whether it appears or not.
- If it comes up again, you need to uninstall this application and then reinstall on your computer. Besides, it is better not download unknown software from malicious websites. Such hostile programs do not only bring potential viruses to your computer but also leave vulnerability to the occurrence of runtime errors.
- When the error is not caused by virus infection or application problems, you really take Windows registry errors into account. As registry serves as the database of your computer, any broken, damaged or out-of-date registry entry can lead to a computer runtime error. It is urgent to repair your registry problems when the errors happen.
Source: ezinearticles.com
Follow the steps to fix BAD Sector
Step 1
Double-click on My Computer to open the My Computer window.
Step 2
Select the disk that you want to diagnose and repair.
Step 3
Choose Properties from the File menu. You should see the Properties window for the drive that you selected.
Step 4
Choose the Tools tab.
Step 5
Click the Check Now button under Error Checking Status.
Step 6
Depending on your version of Windows, choose either "Thorough" or "Scan for and Attempt Recovery of Bad Sectors."
Step 7
Click on Start.
There is no any major difference. But still this will help you to understand about Malware, Spyware, Adware And Trojan.
*Virus is a program to cause damage to computer.
*Trojan is a program which is used to gain access to a computer by installing a program on infected PC to open some backdoor. [Trojans are also known as Backdoors].
*Worm is a program which infects the computers which are connected by some network. Worms slow down the network.
* Spywares are the program which are used to monitor/Log the activity performed on a computer. These are used to spy on some one either for legal or illegal perpose. Example: Keylogger applications.
* Adwares are the programs which delivers ads to your computer (generally in POP-UP's form). They consume your network.
*Malwares are the program with malicious intention. It can be damaging your computer, spying on you or any other malicious task.
For More Details: Virus Removal Support
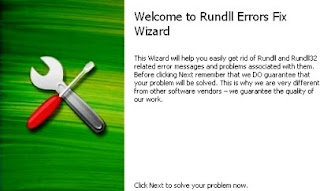 RunDLL errors occur when some applications that are loaded from the registry are corrupted. These files slow computer performance and display errors during normal Windows processes.
Follow the given instruction which fixes the errors and improves the speed of the computer:
- Click the "Windows Start" button and select "Run." Enter "services.msc" in the text box. This opens the services screen that shows all the applications running on the computer.
- Right-click the service that is causing the errors and select "Stop." This allows you to delete the service files and remove them from the registry safely.
- Click the Windows Start button and select "Run." Type "regedit" into the text box and click the "Enter" key. This opens the Windows registry where the RunDLL file is removed from start-up.
- Navigate to "HKEY_LOCAL_MACHINE> SOFTWARE\ Microsoft\ Windows\ CurrentVersion\ RUN" in the registry. This is where the Windows computer loads applications into memory when the computer boots. Right-click the DLL file that is causing the errors and select "Delete."
- Reboot the computer after the registry edits for the changes to take effect. Now that the RunDLL file has been removed from start-up, the errors will cease.
For More Details: Fix Rundll Errors
 Microsoft System Image Manager is the tool you use to build and assemble Windows 7 answer files. You can assemble features, packages, and answer file settings. Windows Setup uses Unattend.xml to assemble and customize the default Windows 7 installation for all conformation passes. For instance, you can assemble Internet Explorer, assemble Windows Firewall, and define the hard drive configuration. You can use Windows System Image Manager to assemble Windows 7 in several ways, including the following:
Advantages of Windows System Image Manager :-
Install third-party applications while installation. Customize Windows 7 by building answer files. Employ language packs, service packs, and updates to an image while windows 7 installation. Add device drivers to an image while installation. With versions of Windows previous than Windows Vista, you had to modify answer file settings manually using a text editor, even after initially building an answer file by using Windows Setup Manager. The Windows 7 answer file depends on XML and is far too composite to modify manually. So you must use Windows System Image Manager to modify Windows 7 answer files.
In another development, Windows Setup (Setup.exe) is the program that installs Windows 7. It uses image-based setup (IBS) to give a single, interconnected process with which all customers can install Windows. Image-based setup does clean installations and upgrades of Windows. Windows Setup and image-based setup permits you to prepare Windows 7 in your firm easily and cost effectively. Windows Setup comprises of many new features that help installations that are faster and more logical than Windows XP, including the following:
Enhanced image management using Windows System Image Manager :-
Windows 7 images are saved in a single .wim file. A .wim file can save many instances of the operating system in a single, highly compressed file. The install file, Install.wim, is positioned in the Sources folder on the new Windows 7 media. Streamlined installation - Windows Setup is optimized to enable the deployment assumptions used by most firms. Installation takes less time and gives a more uniform configuration and deployment process, resulting in less deployment costs.
Faster installations and upgrades using Windows System Image Manager :-
Because Windows Setup is now image based, installing and promoting Windows 7 is faster and easier. You can do clean installations of Windows 7 by deploying the Windows image to destination computers, you do promotions by installing a new image on an existing installation of Windows. Windows Setup saves the former Windows settings while the installation. Windows Setup amends the installation experience over Windows Vista. For example, Windows Setup moves the license key to the Windows Welcome page, providing users to type a product key after completing installation. Windows Setup also automatically builds a small, hidden partition for BitLocker Drive Encryption. This makes it easier to enable BitLocker Drive Encryption later, because users don’t have to prepare the drive. Additionally, the final stage of Windows Setup, Windows Welcome, is faster and gives more feedback on the progress of the setup process.
In another development, the new Windows 7 distribution media includes some of these tools, including Sysprep, DISM, and other command-line tool, but they aren’t on the media in a separate file such as Deploy.cab. The Windows AIK 2.0 includes the bigger tools, such as Windows SIM, Windows PE, and ImageX. These are the basic tools needed to build, customize, and prepare Windows 7 images.
One of the cool little features that arose from the ashes of the disaster known as Windows Vista was the Reliability Monitor. A little-known tool which is almost hidden within the action center, the Reliability tool is great for tracking your computers reliability.
“Reliability Monitor is an advanced tool that measures hardware and software problems and other changes to your computer. It provides a stability index that ranges from 1 (the least stable) to 10 (the most stable). You can use the index to help evaluate the reliability of your computer. Any change you make to your computer or problem that occurs on your computer affects the stability index.”
Per Microsoft, the Reliability Monitor is intended for advanced computer users, such as software developers and network administrators, but it is easy to use, so even moderate users will have no problem using the tool to track their system over time.
There are two ways to find your PC’s Reliability history:
You can use Windows Search and begin typing the word ‘Reliability’ until the option shows.
Or
Right-click on the white flag in your taskbar to open Action Center.
Click Maintenance. Then, under Check for solutions to problem reports, click View reliability history.
In Reliability Monitor, you can:
* Click any event on the graph to view its details.
* Click Days, or Weeks, to view the stability index over a specific period of time.
* Click items in the Action column to view more information about it.
* Click View all problem reports to view only the problems that have occurred on your computer. This view does not include the other computer events that show up in Reliability Monitor, such as events about software installation.
The Reliability Monitor is a very basic program with a very basic use. It’s one of the many useful tools provided natively in Windows 7 which can help you keep your PC on the right track.
Source http://www.windows7news.com/
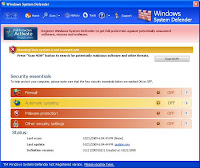
Spyware is an innovative anti-spyware system that protects computer from viruses and pop-up windows. It blocks unwanted files so that these do not automatically get installed in your PC and hack your computer to temper with your personal files.
ARE YOU fed up with the continuous pop-up windows that block your enjoyment while you surf on the Internet? Do you experience the problem of hacking more often? Have you stopped visiting your favorite web sites and have stopped playing online games due to the unwanted disturbance of pop-up window?
The answer to all these questions is block spyware, which acts as a firewall and provides security by protecting your personal computer from viruses, pop-up windows and thus blocks all those annoying pop-up windows, which interrupt your enjoyment.
There are various ways to protect your personal computer from the regular threats and thus preserve your privacy. Anti-spyware is one of the most thorough and fast scanners that detect spyware and other exploits, which corrupt your computer programming. It scours the web for new threats and provides daily definition updates. It easily removes threats, such as adware, spyware, Win Fixer, Spy Axe, Spy Falcon and many more. So get a block spyware and free yourself with all the worries of spyware threats and enjoy your privacy.
Are your private documents on personal computer at risk?
To answer it simply, yes. Every time you access your Internet, unprotected and corrupted viruses or cookies and tracking devices are installed on your computer.
Spyware devices can be used to track your Internet activities, thus, hacking your keystrokes to obtain passwords or to gather important information from your personal files. So to avoid spyware, upload anti-spyware software, which maintains your privacy and helps to identify theft, thus, protecting your information from being robbed. One of the chief features of block spyware is that it blocks the threat that can corrupt the functioning of a PC.
Your privacy is our chief concern. Our business is to evacuate the web from all the corrupted companies that install spy software on your PC. Dangerous and annoying spyware can destroy your programming in many different ways, when you use Internet. Spyware removal utility provides a personal privacy tool that detects and eliminates destructive pests like spyware, adware and hacker tools. It confiscates virus and corrupt cookies, thus providing protection against non-viral malicious software that hack your private information, thus infecting your existing security and personal privacy. Block spyware provides you with all the necessities through which you can protect your personal information and can maintain your enjoyment and privacy in best possible way.
Have you ever been facing some kind of problem when you are working on a project like computer just stopped? You try to move the mouse, you press the space bar and then start pressing anything when you got irritate or want to just computer start anyhow. The reason you have problem like this is because there is some file missing in your registry. And registry file are more important for your computer because they contain all of the information related to hardware and software on how your computer is supposed to work. If any of file is wrong or missing, your computer won’t work.
If you have ever downloaded music, video games or software or any stuff online. There is a very fare chance to your registry files are changed. These registry files can easily get changed. And when they are changed, you might not observe it right away.
For some time you didn’t run some program, you will never know the registry files for this are messed up. And just because of messing this file might not mean the program will not work. It may just work a lot slower. So when you ever have complained about your PC slow. Optimize the registry files also help to speed up your computer.
And Fix registry for Windows XP Professional you have to download a registry cleaner for Windows XP Professional. Once you download that software you install it in your computer, run a scan of your entire computer’s registry files. All of the errors will be found and let the registry repair software fix everything.
To fix this, you can download a registry cleaner for Windows XP Professional. Once you install this software, with a few easy steps Registry Mechanic will scan your entire registry for any invalid entries and provides a list of the registry errors found and registry cleaner software helps you to automatically fix computer.
If you still having problem then you can have online desktop support uk from any resource. There are number of online support services to help you.
9 ways, arranged in a sequence such that it will help improve computer speed and let it work without complaining:
1. You will need to delete those emails that are not in use from your system. This may be basic but surprisingly they are people who are always complaining, but who refuse to dump years and years of accumulated e-mail.
2. Get a good anti virus program (get only one), have it up to date, and auto monitoring.
3. Get a good anti spy ware program (get only one), have it up to date, and auto monitoring.
4. Run Disk Clean Up Daily to make sure that the unused datas will not use up your hard drive space (click Start> Programs> Accessories> System Tools> Disk Clean Up – a box opens – make sure each box is checked, click ‘OK’ – a box pops up – Click Yes).
5. Delete Cached Files and cookies Daily (click ‘Start’> Control Panel> Internet Options – a pop up box will appear – Delete Cookies, Click OK, Click Delete Files – check ‘Delete All Offline Content’ – Click OK, Now Set Your Clear History to no more than 7 Days – Click OK) This will help to improve computer speed when you get onto the internet.
6. A very important step almost everyone misses: Empty The Prefetch Folder (Click start> My Computer> C > Windows > Open Prefetch Folder > Select All(Ctrl+A) and press Delete – pop up box appears – Click Yes, Close Windows Window)
This will improve computer speed greatly.
7. Go to desktop and empty your Reycle Bin. This will make sure your computer have enough space to run programs as well as improve computer speed.
8. Scan Hard Drive ‘C’ (Start, My Computer, Right Click ‘C’ – box opens – Click Properties at the bottom – another box opens – Click Tools, Click Check Now, Make sure both ‘Automatically fix file system errors’ and ‘Scan for and attempt recovery of bad sectors’ are checked, Click Start)
This might take some time, so you can watch tv or do something else while it finishes. You will find your computer speed becoming much faster after that.
9. Defrag Your System (Start, Programs, Accessories, System Tools, Disk Defragmenter – window opens – Select ‘C’ Drive, Click Defragment).
Again, this might take some time, go and do something else to kill your waiting time.

What was originally devised as an interface for what was once called the Windows 7 Media Center PC it is basically a computer operating on Windows XP that’s solely configured for working out multi-timedia solutions and is often loaded with a TV tuner card and add to that a special wireless remote; one can now use the Windows version of this attractive application to play music, view digital pictures, play movies, and also get the option to watch and record TV (provided your computer comes loaded with a TV tuner card).
How to fix repair windows 7 Media Center :-
Remember, that a user can only connect a computer that is running the Windows 7 Media Center for Windows directly to a home entertainment center by buying the Media Center Extender. Connecting directly to an Xbox 360 by buying the Media Center Extender for Xbox is also a viable option. When Windows 7 Media Center is launched , the Welcome to the Media Center Wizard will be directly visible , which guides one through the steps of setting up the center of a screen display, then configuring it to get a TV signal and downloading the TV guide which is available online. If a computer comes with a TV tuner card, that is. Thereafter, each time the Media Center is launched, the program reveals a full screen in a largely dark-blue window.
How to Access Windows 7 Media Center :-
Since the Media Center options have been crafted to be accessed by enabling the use of a special Media Center remote control along with a standard mouse, its interface is a lot times fluid than what can be usually found in other conventional Windows application. The first thing that will come in sight in the Media Center interface is the amount of audio and visual feedback it emits.
When a program is launched like the new Windows 7 and one selects the menu option thereafter, Windows gives you distinct tones and clicks as well as visual answers to enable people to know which menu option to opt for and when the selection is completed.
Once the preferred option is selected, the user can select and display its sub menu options by clicking on the mouse button. With the Media Center remote control, move up and down through the main menu options by pressing on the device’s up and down arrowheads. Click the OK button which is located around the middle of the remote from the one which separates the arrowheads and choose the main option accordingly.
How to play media files in windows 7 media Center
You can play Media files in Windows 7 using Windows Media Player. On computers, the term media refers to something other than text: Audio and video are examples of media. Audio is a term that has wide variety of items for music and other sound files, such as books on CD. Music is often entirely digital nowadays. You can use Media Player to play the sample music included with Windows 7. You can play your audio CD on your computer using Media Player. If you want to make that CD playing more convenient then you can copy the audio files to your computer. You can create your own CDs with a library of music copied from your CD collection and you can also combine tracks. You can also copy audio files to an MP3 player.
To resolve this issue, follow these steps.
If you have the Windows XP CD-ROM, use one of the following methods.
Resolution for Cause 1
To resolve this issue, remove the media in your CD, DVD, or floppy drive and then restart the computer.Advanced troubleshooting
This section is intended for advanced computer users. If you are not comfortable with advanced troubleshooting, you might want to ask someone for help or contact support. For information about how to do this, visit the following Microsoft Web site:Resolution for Cause 2
To resolve this issue, you must have the Windows XP CD-ROM. If you do not have the Windows XP CD-ROM available, you have to call your computer manufacturer to troubleshoot the issue.If you have the Windows XP CD-ROM, use one of the following methods.
Method 1: Troubleshoot the specific element that causes Windows not to load
Note This option requires that you perform multiple steps to determine the exact element that causes the issue. This option may allow for you to keep customizations in Windows.- Restart your computer in safe mode. To do this, press the F8 key while Windows is starting. Then, create a Windows XP boot disk to start the computer.
For more information about how to create a Windows XP boot disk, click the following article number to view the article in the Microsoft Knowledge Base:305595 How to create a bootable floppy disk for an NTFS or FAT partition in Windows XP315222 A description of the Safe Mode Boot options in Windows XPIf you can start the computer from the boot disk without receiving an error message, the damage is limited to the master boot record, the boot sector, or the NTLDR file. After Windows XP is running, immediately back up all data before you try to fix the boot sector.
Use Disk Management to view the partition information and to verify that the disk partition (or partitions) is correct. To use Disk Management, follow these steps:- Click Start, right-click My Computer, and then click Manage.
- Expand Storage, and then click Disk Management.
If you do not have a current backup copy of the data on the computer, contact a computer specialist to determine the best method of data recovery and configuration. - Run a current virus scanning program to verify that no virus is present.
- Repair the master boot record by using the FIXMBR command from the Windows XP Recovery Console.
For more information about how to use the Recovery Console, click the following article number to view the article in the Microsoft Knowledge Base:307654 How to install and use the Recovery console in Windows XPNote For more information about an error message that you may receive when you use the FIXMBR command, click the following article number to view the article in the Microsoft Knowledge Base:266745 Error message when you run fixmbr commandWarning If your computer is infected with a virus and you use the FIXMBR command, you may be unable to start the computer. Before you use this command, make sure that the computer is not infected with a virus. - If the primary boot partition is a FAT partition, use the FIXBOOT command from the Windows XP Recovery Console to write a new boot sector on the system partition, and then use the FIXMBRcommand to repair the master boot record.
Method 2: Repair your Windows installation
Note Repairing your Windows installation may change the configuration of Windows. You may also have to follow this step if you complete all the troubleshooting in steps option 1 and the problem is not resolved.- Use the Windows XP CD-ROM to start your computer. On the Welcome to Setup screen, press ENTER to set up Windows XP.
- Press F8 to agree to the license agreement.
- Use the ARROW keys to select the Windows XP installation that you want to repair, and then press R.
Windows XP Setup repairs the installation files, Windows XP automatically restarts, and then the Setup program finishes the repair of your Windows XP installation. - Follow the remaining steps to set up Windows.
Note You must have your 25-character product key to complete these steps. - As soon as this issue is resolved, make sure that the firewall is enabled, and then visit the following Microsoft Web site to reinstall the latest updates:
- Run a virus scan on the computer because problems with corrupted elements can be attributed to viruses.
1. Check if the USB device is properly connected. Many times, if the contact between the connectors is even slightly lose, the device may not be detected. Check if the internal connectors to the motherboard are fixed properly.
2. Many USB devices work on the computer power supply, but a few have a separate power supply. In such cases, ensure that the USB power supply is switched on after making suitable connections.
3.Device drivers are usually provided separately on a CD, though some USB devices work with the default drivers available with Windows. The device drivers must be installed on your computer . Check for the latest versions of device drivers on the manufacturers website. Also ensure that the latest device drivers for your motherboard are installed.
4. Uninstall the USB device through device manager. Switch off the computer, unplug the USB device Check if the latest device drivers are installed and and restart the computer. Windows will automatically install the device drivers. Connect the USB devices again.
5. Many times USB devices, especially pen drives are faulty. In such cases, get a new device as a replacement from the manufacturer, if the product is under warranty.
6. Try connecting the USB device in Windows Safe Mode. If the device works properly in safe mode, but not normally, there may be a problem with some software installed on your computer.
7. Some times, you may have USB 2.0 hardware ports which are detected as USB 1.0 because of the Operating System Installed. Windows XP supports USB 2.0 only from Service Pack 1 onwards, so for older versions of Windows you may face this problem.
8. If the screws or internal adhesives detach and the USB nose plays in and out (loose). Then attach the USB to a USB cable permanently. You can also open up the flash disk and add more adhesive or tighten the screw. Avoid using much force when plugging in USB to the computer Ports.
9. Run antivirus scan every time you connect a unfamiliar flash disk to your computer. It may have a virus or malware. you can get free anti-virus now.
10.Use Data recovery software to get lost data from your USB drive.
source:-http://www.trcb.com/computers-and-technology/computer-repair/how-to-fix-usb-device-or-flash-disk-problems-12324.htm
Follow the steps below to TUNE UP Your WINDOWS XP PC :-
1. Run “Windows Update” regularly, or use the automatic “Critical Updates Notification”.
2. Install anti-spyware software (Ad-aware, Spybot S&D & Spyware Doctor are all good ones) and keep it updated. Spyware Blaster runs in the background and stops spyware installing itself.
3. Run the anti-spyware program regularly to keep your PC clean.
4. Install & regularly update your anti-virus software.
5. Run the anti-virus program on a regular basis.
6. One option is to enable “Microsoft Firewall”. However MS Firewall does not control outgoing connections (ie. a virus/worm trying to ‘phone home’). Download and install ZoneAlarm – a free version is available.
7. Make sure there’s nothing in the Startup list. (Start Menu> All Programs> startup) Unless there are programs in the list that you need to run when the computer starts up, it should be empty.
8. Uninstall unnecessary or rarely-used programs in “Add/Remove Programs”.
9. Clean the Desktop icons you don’t use. Put them in a folder (preferably not on the desktop) if you are nervous about deleting them.
10. Clear the Recent Documents & Programs list, on Taskbar & Start Menu properties.
11. Internet Explorer users:
* In “Temporary Internet Files”, delete cookies, and delete files.
* In the “Advanced” tab, uncheck all “Install On Demand” items and disable Javascript and VB Script listed under “Microsoft VM”.
12. In your “Windows” folder, manually delete files in the “Temp” folder.
13. Delete unused system tray programs.
14. Remove startup programs with the MSConfig application (Start>Run> “msconfig”, OK).
15. Run Windows Disk Cleanup. Do this at least twice a month. Make sure ‘Recycle bin’ is checked to periodically empty it.
16. Run MS Disk Defragmenter. Do this at least once a month (Start Menu> All Programs> Accessories> System Tools).
17. Update your drivers for CPU, memory, video card and sound card, etc. Download the driver updates from the manufacturer’s web site.
source:-http://www.tech-support-news.com/computers/how-to-tune-up-your-windows-xp-pc/
If your computer shuts down or crashes you might find yourself in a annoying situation where the computer continuously reboots in a loop while attempting to start Windows.
This may be caused by the registry becoming corrupt as a result of an application writing to the registry at the time of a system crash. The next time the computer boots up and tries to read the registry the system fails and has to restart.
To fix the problem
* When the computer restarts, shortly after the initial beep press F8
* Select "Boot from last known working configuration"
If the above does not fix the problem you might want to work your way through my How to service your PC article to replace and recover corrupted Windows files that might be causing the problem.
Steps to prevent continuously restarting during bootup
* Click Start
* Settings (Skip on Windows XP)
* Control Panel
* System (May need to click "Switch to classic")
* Advanced Tab
* Press Settings button
* Uncheck "Automatically restart"
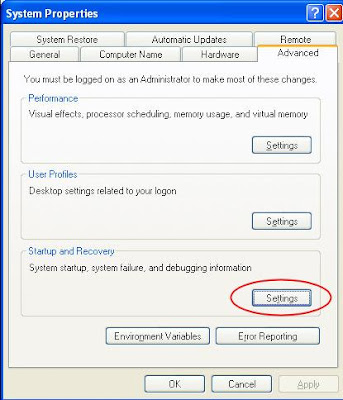
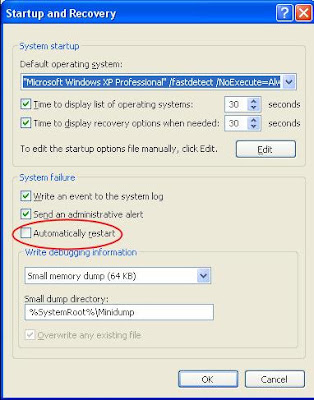
This will prevent Windows from restarting even when it encounters an error during the bootup process.
source:-http://www.alexnolan.net/articles/restarting.htm
Incremental data backup technique allows you to backups all the files that have been modified since the most recent normal or incremental backup performed. The presence of the archive bit indicates that the file has been changed and only files with this attribute are backed up last time. When a file is backed up, the archive attribute is cleared. If the file is later modified, this attribute is set, which means that the file needs to be backed up.
An incremental data backup is a process in which several backups are kept (not just the last one). These backups will be incremental, if each original piece of backed up information is stored only once, and then successive backups contain only the data that changed since a last backup.
Let’s assume if you perform an incremental backup on Tuesday, you only back up the data that modified since the incremental backup on Monday. As a result, it’s faster backup technique. The plus points of incremental backups are the short backup duration and the less data to be backed up.
Incremental backup technique offers much greater flexibility and perform backup at rapid speed. However, the process takes longer time to restore because the backup has to be reconstituted from the last full backup and all the incremental backups.
Conclusion
Incremental data backup is a faster method of backing up data than frequently running full backups. During an incremental backup only the files changed since the most recent backup are included. That is why it gets its name: each backup is an increment since the most recent backup.
Advantages
• Backup time is faster than full backups.
• Incremental data backups require less disk space, tape, or network drive space.
• You can keep multiple versions of the same files on different backup sets.
Disadvantages
• During a restoration process, you must have all of the incremental backups available.
• It may take longer to restore a specific file since you must search more than one backup set to find the latest version of a file.
Data backup & restore is a critical process and must be performed carefully. Although, Windows operating system offer user friendly tools to perform and restore data backup but one may find difficulties due to the technology involved in this process. If you want to perform or restore data on your PC and looking for professional assistance, call a tech support organization and avail data backup services at economical rates. There are various organizations that offer remote data backup services that mean their certified technicians can remotely connect your PC and perform data backup and restore operation as per your requirement.
Upsell for iYogi
• Call iYogi! Our Microsoft certified technicians help you in performing and restoring data backup.
• Contact iYogi to sort out issues related to data backup.

If you have MS Word installed on your computer, there are chances that you might face some complications while using it. For instance, we know that it is normal for users to replace existing file servers with fresh ones. When you do this, the older one is usually not removed and both the servers are used simultaneously at the same time.
However, when you start operating and removing older files, Microsoft Word might hang. There are viable solutions to repair this Microsoft Word flaw.
The Microsoft Word might hang when documents from shared locations are opened from local drives as well.
An attached template is present in every Word document and if the template cannot be found and is missing, Windows XP usually tries to look for it and does the search all over again. If this template had been located in the old server and if the old server has been taken offline, it is impossible for Windows XP to find the template.
The Word will appear to look like it's hanged. This is so because the time taken to locate this missing file will be long and it will take the same time for the document to open.
It might take even longer for the document to open if your computer is connected to a network. The time is considerably shorter when disconnected.
In another case, we all know that Microsoft Word provides a template for Field Codes. These codes can be quite a nuisance if they are not taken care of properly.
It is normal that one would expect to see cells and data from the worksheet in Microsoft Excel in the document. However there are times when you will not find the Excel worksheet.
You will need the help of Microsoft Word to tackle this issue. The problem could occur because the field codes have been placed wrongly in a document instead of the field code results. It is also possible that all placeholders would be disclosed and revealed for content, which should have actually been for the content itself. This could have been done accidently when ALT+F9 could have been pressed in a document or when you had pressed SHIFT+F9 by mistake.
When these commands and the shortcuts are deliberated by mistake, a caption "text in brackets" will be displayed in the documents and not the content that you expect to see. Microsoft Word Help support starts here, and you will have to go to the official Microsoft Website. However, you will not find the keywords for "text" and "brackets" in the search.
The catch here is that the text was never in brackets as it seemed to have appeared to the user. They are actually texts itself with curly braces. And curly braces as a keyword will show in the Microsoft Word Help. This issue can be resolved by pressing ALT+F9. This will be the patch between the field code results and displays. The key will give an option in Word, which will make field codes to be shown and not the results if you open a document. The selected or cleared option will rely largely on the version of Windows used by the user.
The techniques to repair this Microsoft Word error are given separately for Microsoft Word 2003 and 2007 versions. But the difference will not be in the keys since for both the versions ALT+F9 applies. Only the templates to select from will make the difference.
However, if you are facing some other issues related to any version or edition of MS Word, you can always go for reliable tech support. These tech support organizations adopt remote desktop technology to fix any problem that you are facing while using MS Word.
If you live in Leicester and are looking for high quality and affordable home computer support, we at iYogi provide premium quality technical support to answer your queries.
Having trouble booting your computer or error messages pop-up itself after a certain interval, your computer crashes or fails to respond to clicks. There is no need to get worried, call iYogi and we will fix your problem right.
If you live in Leicester and are looking for high quality and affordable home computer support, we at iYogi provide premium quality technical support to answer your queries. Our Microsoft certified technicians offer extensive knowledge base and advance tools for diagnosis, repair and maintenance.
Our services include:
• Installation/Reinstallation
• Upgrading System
• Troubleshooting error while launching or working with the application
• Performance optimization
• Configuration of the mail
• Support for playing different multimedia file formats
• Removal of virus and spyware
• Data backup
• Driver installation
iYogi provides next-generation, personalized remote computer support to meet the demands of home and small business consumers. Our comprehensive support spans over 100 desktop software applications, server, hardware devices, printers, peripherals, routers and modems.
Our highly qualified tech experts are available 24/7/365 to assist you and ensure peak performance and customer satisfaction.

Internet, no doubt, is the best medium to get perfect solution to any query in this world. If not solution, it does provide you at least the source from where you can seek answers to your questions. I, in fact have found easy solution to the gravest of the problems on this interesting tool. Last week, I formatted my computer and when I was trying to install the printer, I realized that its driver CD is missing. I had no time to rush to shop as it was almost 11:30 in the night. Again, I accessed the Internet to find some solution to the same.
Here, I am discussing some easy steps that I followed to install printer on my computer without a CD. However, if you don’t have the printer driver disc, you can access the manufacturer’s website to download the drivers for your specific model of computer. Here are some of the easy steps that you can follow to install the printer in your computer.
Step 1. Identify the model of your printer
Step 2. Check the OS of your computer. If you don’t know how to do it, then go to “My Computer -> Properties ->General”
STEP 3. Search for the particular driver over the Internet and then download the file to particular location.
STEP 5. After following the steps of installation, restart your computer for allowing the hanged to take place.
STEP 6: Take a test print to find out whether it's installed correctly or not.
Recommendation:
If you are not a tech savvy and are installing the printer for the first time, do not take a risk and go for some technical support. However, if you don’t get any help in person, you can always go for iYogi Technical Service’s package for printer support and can install the printer of your choice at any point of time.

HP is a recognized manufacturer, which deals in all kinds of computers, printers, scanners and other peripheral devices along with their accessories. It keeps on introducing latest technologies in its products, so as to give you a new experience every time.
HP has introduced innovation in mobile computing; there are some ultra portable models like Compaq Mini CQ10 series, Compaq Presario CQ61Z series and HP Pavilion dm3z series which are quite popular.
However, sometime you may face issues with your HP computer, when you need to implement the best troubleshooting technique. Some of the most random issues of HP computers are slow performance, blue-screen error, audio problems and low memory. On rare occasions, you may also face problems with installation of software and hardware devices on your HP computer.
You can follow some easy troubleshooting steps to enhance your computer’s performance and reduce the chances of blue-screen error. Mainly, these occur due to lack of memory. There are free utilities like Disk Cleanup and Defragmenter, which can delete unwanted files and generate extra space on your computer’s memory at no cost.
However, memory of your HP computer can also be flooded with some virus infected files. In this situation you can troubleshoot your HP computer by scanning with compatible antivirus software, such as Avast Free Antivirus, AVG Anti-Virus 9.0 and Norton Internet Security 2010.
At times, your operating system might also get corrupted.
Follow the below troubleshooting steps to rectify/repair you corrupted Windows 7 OS:
Step 1. Insert a valid Windows 7 CD into the DVD drive and restart your computer.
Step 2. Change the boot order through BIOS, if required.
Step 3. Select the language you prefer and mention “Time” and “keyboard input”. Click “Next”.
Step 4. You will be getting three options, select “Repair Your Computer” followed by “Command Prompt” to run the effectual utility tool called "bootsect.exe". It will repair your Windows 7 operating system.
To get real-time resolution for any issues related to your HP product, you can always contact some tech support organization. These organizations have a team of experts and proper technology, which make them capable of resolving any issue related to HP product with an ease.

Software installation is required to support proper functioning of computer application programs. Without software, system will not be able to execute any application program. If you feel any difficulty in installing software on your PC, you can seek technical assistance from any technical service provider organizations.
The different types of software are as follows-
Shareware software: This type of software can be downloaded directly from the internet.
Adware and Spyware Software: It is a free software that is supported by advertisements preloaded in the program itself. It steals the data from user accounts without its knowledge.
Freeware Software: Freeware software is downloadable from the Internet free of cost. Freeware software is only available for personal and commercial use software requires a paid license. Freeware software is totally secure from adware’s and spywares.
Driver Software: Drivers are the software that supports the functioning of application programs. Some of the drivers are audio drivers to support the sound effect of system speakers, video drivers to support image and video display on screen.
There are different types of freeware software available, such as AVG antivirus software, McAfee antivirus software, Compaq sound drivers software, audio mastering software, printer installation software, virus update software, MS office etc. Installation of software can be done through CD, USB drives. To run any application program on computer, you require software compatible with application program. To make use of the printer or to listen music, you need to install software drivers for printer and audio drivers for speakers to enable sound effects. To secure your PC from hazardous affects of virus and Trojans you need to install antivirus security software at your system
Installation of software is prime concern to have advantage of various computer applications. If you hit upon any difficulty in installation of software on your PC, then you can seek quality technical assistance from any certified tech support organization.

Microsoft Office Outlook 2007 is a personal information manager developed by Microsoft. It is a part of Microsoft Office 2007, and is available both as a separate application as well as a part of the Microsoft Office 2007.
It is mainly used as an e-mail application for sending and receiving e-mails. It also contains a Calendar, Task Manager, Contact Manager, and note taking application. With this article, I aim at offering Microsoft Office 2007 help, as it contains tips and tricks for using Outlook effectively.
Many of the companies provide Microsoft product support and also provide help for Microsoft outlook. If you are unable to setup an account in Microsoft Outlook, then the following steps might help you on how to set up Microsoft Outlook:
STEP 1: Firstly, you need to find the type of account for each of your e-mail accounts like (POP3, IMAP or HTTP). You should also know the name of the incoming mail server, such as: mail.isp.com, and the name of the outgoing or SMTP mail server, such as: smtp.isp.com. You can get all this information in the service provider FAQ file or by e-mailing the service provider.
STEP 2: Start Outlook Express and select ‘Accounts’ from the ‘Tools’ menu. Now, click on the ‘Mail’ tab.
STEP 3: Click ‘Add’ which is on the right side of the box and choose ‘Mail’. The ‘Internet Connection Wizard’ will appear.
STEP 4: Now, type the display name for the account and click ‘Next’.
STEP 5: Click the top radio button if you already have the new account. Write the name of the account and click ‘Next’.
STEP 6: Now, type the mail server information, which you collected in the first step and click ‘Next’.
STEP 7: Type the user name as it shows on the account. For example, the account name of feedback@123.com is "feedback."
STEP 8: Now, type the password to access the account. You can contact the e-mail service provider if you don’t remember the password. If you don't want Outlook to prompt you for the password each time, then you can also check the ‘Remember Password’ box.
If you will follow the above steps, you can easily configure any e-mail account with Microsoft Outlook.

Spyware is program which gets installed in a computer to gather important information about the user secretly, and expose it to hackers and third party. Spyware can get into a computer as a software virus or as the result of installing a new program which steals important information like passwords, files, pictures etc.
Most of the undesirable software, including spyware, are made to be difficult to remove. If you will try to remove this software, then it might reappear again, when you restart your computer. Fortunately, there is a way to protect your computer from such attacks. You can search and install a free spyware removal program to remove spywares from your computer.
Where to Get Antispyware Software
If you are facing difficulty in removing unwanted software, then a tool might help you to do this job. Microsoft Security Essentials is an antimalware software which removes spyware and you can get this software free of cost from Microsoft's website. It also guards your system from spyware attack, viruses and other malicious software. It i0s available as a no-cost download for Windows XP SP2 and Windows operating systems.
Several other companies also provide free spyware removal tools that will detect and remove spyware from your computer.
You need to keep in mind that if you uninstall unwanted software using these tools then you may not be able to use a free program that came with the software.
Beware of Fake Anti-spyware Software
Everyone wants to keep their systems safe from spyware attacks. Hackers will often try to trick you with sham security software called as "rogue security software" or "scareware." It creates deceptive alerts, or attempts to attract you to participate in fake transactions.
To get rid of all these issues, you must install software which protects you from all these attacks. Purchase extensive software which comes with other software like, antispyware, antiworms etc, which could also infect your computer.
Related Post:
Computer AntiVirus Protection
Free Trojan Horse Removal
Virus removal

HP is a global leader in manufacturing electronic products like computer, printer, scanner and other useful gadgets.
HP computer
HP has entertained its users with innovative technologies in its computer products. It’s always on the top search of users.
Some basic problems of HP computers include: Blue-screen error, slow performance, audio issue, video display issue, disruption in Internet service and corruption of operating system.
You can troubleshoot issues related to drivers of video display and network of HP pavilion laptop by practicing some easy steps.
If you have gone into trouble with installation of a particular new software or hardware on your computer, then remove it, it may not be a right choice for your computer, or driver would be unmatchable. Now, restore your computer as: Start> All Programs> Accessories>System Tools>System Restore.
But, if the condition of your HP pavilion laptop is worse and you are not able to boot it, then restart your computer and press the "F8” and choose "Safe Mode." When you log on, you'll automatically see the option to start the "System Restore" process.
Next, check the status of your driver device. Click on the "Hardware" tab followed by "Device Manager" button. Click the plus sign corresponding to each piece of hardware. Examine for any yellow question marks or red exclamation points on the list. Yellow mark means that your driver needs to be replaced with a compatible one while red shows some connectivity issue, which can be fixed by using appropriate cable in right direction.
Now update your driver and again cross check the Device Manager.
HP printer
HP has introduced some popular models of printer with noble features like, HP Deskjet F4400, HP Deskjet D2600 and all-in-one HP Photosmart C4600. These portable printers have modern design and easy to use control panel.
Generally they are reliable, but sometime they could be problematic. Go through the blog to know the troubleshooting of some of the random issues on HP printer.
Paper jams: Most probable reasons are accumulation of dust, use of wrong paper type and friction on paper rollers. Regular maintenance should be done to avoid such issues. But once you got into the problem you should handle it gently. Pull the paper in the direction of movement and if your roller is not in proper condition, then replace it with the help of manual.
Improper printing: Possible causes include, the printer might be low toner level, the print density could be on low or Economode printing may be turned on. If the printing is faded due to low toner, then remove the cartridge and shake it vigorously to distribute the toner in homogenous way. But if there is some setting problem then make a test print to know the type of setting required. If Economode is on, then turn off it and set the print density to higher concentration.
Ghosting: It is the condition when an image is created as a background, which happens due to problem with the power outlet, so check the power cable, unplug and plug it again, if possible try the cable with some other printer. It may also happen when drum or imaging kit are about to exhaust. So you can replace them to get good printing.
For each and every troubleshooting technique, you must follow the chart diagram provided along with the manual of HP. However, if you fail on certain issues, then you can avail tech support services from leading organizations. It’s better to get registered yourself with an organization, which could give you tech support on remote basis, so that you don’t have to go anywhere. Moreover, you have the privilege to access them on 24/7 basis.
Related posts:
Computer troubleshooting
Computer problems

Undoubtedly, all the Windows users are familiar with Microsoft Office. Microsoft Office 2003 software is developed by Microsoft for Windows. Its main applications are Word, Excel, Outlook, PowerPoint and Access. It is most popular suite as it has been the most widely used since its versions for Windows 1.0, which was launched in 1990.
So why would someone want to remove such a helpful software from computer? Possibly the software is corrupted, you are receiving error messages while using an Office application, or you want to switch over to another software equivalent to Microsoft office.
The typical un-installation process is to use the ‘Add/Remove Programs” functionality in Windows. However, sometimes using this option will also give you error messages. If this is the case, you can look for an alternative solution - one of which is to use an uninstall tool called Perfect Uninstaller.
The typical uninstallation process is as follows:
Step 1: Click on the ‘Start’ and then click on ‘Control Panel’.
Step 2: Now, in the ‘Control Panel,’ navigate to ‘Programs and Features’.
Step 3: This window will show all the programs installed on your PC. Find the program that says something along the lines of “Microsoft Office.” This will differ depending on, which version of MS Office you have on your PC.
Step 4: Now, click "Microsoft Office," and then click ‘Uninstall’. To completely uninstall Microsoft Office, follow the prompts on the screen.
Step 5: Reboot your computer to refresh it and make sure that no unnecessary MS Office files are left on your system.
Following the given steps will help you successfully uninstall MS Office from your computer.
Subscribe to:
Posts (Atom)